Applying gold, silver or copper leaf can be fun, just keep that fan turned off and keep the windows closed… A whiff of a breeze can send your gold leaf flying!

When you apply a thin leaf of gold to your Kuan Yin, your Buddha or your Wealth God, it is considered a very pure offering to the cosmic deities. Doing so has the power to placate local wandering spirits so they bring good fortune to your home and will not cause you obstacles.
Postage-stamp-size booklets of gold leaves made of exquisite 24 carat gold are the best to use as they are deemed to be pure gold; and these are easily available at most Chinese medicine shops. You can also get them from any World Of Feng Shui shop; although you must also get the right kind of glue, and get your timing right, allowing the glue to dry sufficiently before pasting on the gold leaf if you want your gold leafing to be successful.
Usually, the leaves of gold are pounded to .000005 of an inch thin. They are made by two poundings with wooden mallets and it takes about five hours of hammering to complete one pouch of gold leaf. The job of slicing the sheets into squares of 2.5 centimeters are done by young girls whose fingers are delicate and light enough for them to also place waxed sheets of paper in between the leaves of gold. They are then stacked into booklets ready to be used.
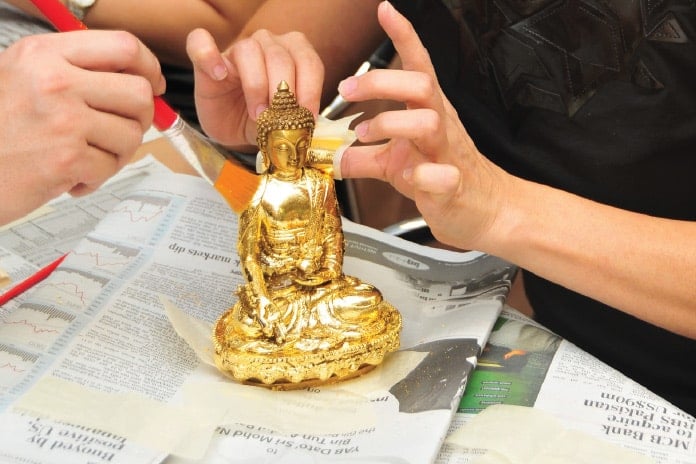
STEP 1 The work area: It is a good idea to cover working surfaces and floor areas with newspaper, and if you are gold leafing a statue, lightly wipe surface areas to remove dust that may be sticking on to the statue.
STEP 2 Paint the surface to be gilded: It is a good idea to use enamel paint onto surfaces before the gilding and a bright yellow usually creates an excellent base for the beauty of the gold to emerge. The paint also produces a high quality, smooth surface for gilding. Ochre, red or beige are also good as colour enhancing undertones.
STEP 3 Applying the glue: Choose the glue according to their “drying times”. This can range from one to two hour glue to 24 hour drying glue, the latter being suitable for larger objects and the glue is then carefully painted onto the surface and the gilding is then done the next day. Use the one hour drying glue for smaller objects.
STEP 4 Testing your ‘glue’: This is perhaps the most important phase in achieving a beautiful result. Determining when the glue is right is the hardest part of the process. It is vital that the glue has dried sufficiently but not overly so before the gold is applied. If the glue has not yet dried sufficiently it will “eat” the gold! When it is too dry, the gold does not stick. But when it is just right, the gold sticks instantly and beautifully. In hot humid weather, the glue dries faster, and when it rains, the glue takes longer to dry. The way to check if the glue is just right is to touch it lightly. If it does not feel wet or even remotely sticky, it is ready to receive the gold.
STEP 5 Applying the Gold: Place a leaf of gold in between thumb and forefinger, then carefully fold back the protective paper to expose the gold leaf. Lay the leaf onto the surface area to be gilded, then “roll’ out the leaf onto the surface. Hold firmly and carefully. Attach leaf to surface. Or you can remove a single sheet of gold leaf transfer paper and then apply it directly onto the surface to be gilded. Gently use a dry sable brush to press the paper that is covering the gold onto the surface. When you see that the gold is stuck to the surface, remove the paper. Continue doing this until the entire surface to be gilded is done.
STEP 6 Touching up: There will be spot areas where the gold has not stuck due to insufficient glue, and these are the areas that will need touching up. Brush on some glue and wait for it to dry before placing additional gold to cover. Remember that it is perfectly fine for the gold leaf to overlay on another leaf. When the gold leaf is completely ‘dry’ use a sable brush to lightly brush off excess gold. The result should shimmer in the light and cast a radiant glow!


